7 Tips How to Teach Physics Concepts Using Toy Cars?

Time:2026-09-10 Author:Liam
0%

Teaching physics does not require an expensive laboratory. A toy car, a ramp, and a ruler can make invisible forces easier to see. This guide explores how to teach physics concepts using toy cars through seven practical classroom ideas. Students can investigate motion, speed, acceleration, friction, gravity, momentum, and energy with familiar objects.

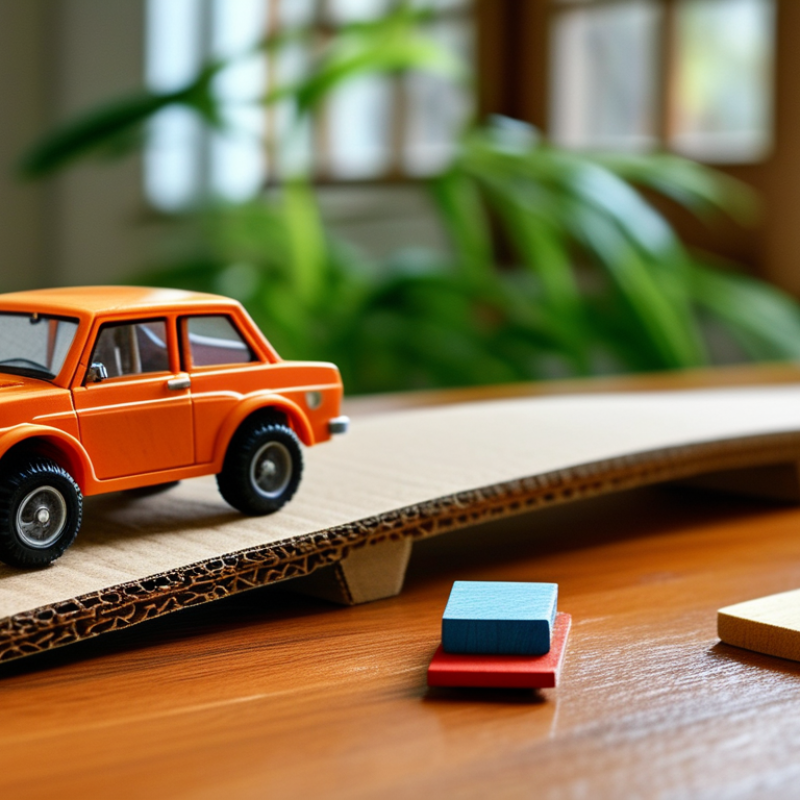
Physics education expert Professor Eric Mazur has said, “Physics is not a spectator sport.” His message fits this approach well. Learners should push the car, observe its movement, measure distances, and explain what changed. A car rolling down a cardboard ramp can reveal how height affects speed. Tape marks on the floor can turn motion into visible evidence. A small block can demonstrate friction when the car travels across wood, paper, or fabric.

Keep the setup simple. Ask students to predict before testing. Then let their results challenge those predictions. This matters because real investigation is rarely perfectly tidy. Wheels may wobble. Measurements may disagree. That is useful, not embarrassing. It creates opportunities to discuss error, repeated trials, and fair testing.

The seven tips will connect hands-on activities with clear physics vocabulary and age-appropriate questions. They will also encourage teachers to distinguish observation from explanation. A car moving faster does not automatically prove that every force increased. Careful reasoning is essential. With guidance, toy cars become more than playthings. They become small, moving laboratories for developing scientific thinking.
7 Tips How to Teach Physics Concepts Using Toy Cars?

Understanding Physics Through Toy Cars

7 Tips How to Teach Physics Concepts Using Toy Cars?

Understanding Physics Through Toy Cars

Toy cars turn abstract physics into visible motion. In my classroom, students begin by predicting which car will travel farther. They examine mass, speed, friction, gravity, and acceleration through simple experiments. A cardboard ramp works well. Place books beneath one end, then release the car without pushing it. Students can change one variable, such as ramp height, while keeping the surface and car unchanged. This practice makes fair testing easier to understand.

Ask learners to measure travel time with a stopwatch and distance with a ruler. Repeating each trial improves reliability. They can calculate average speed by dividing distance by time. A slow-motion recording may reveal when the wheels slip or the car leaves the track.

Students should also draw force arrows and discuss how friction reduces motion. Try different surfaces, such as smooth paper, fabric, and wood. The results often create useful debate.

My early demonstrations were not perfect. I pushed one car slightly, which made the data unreliable. That mistake became a lesson about controlled experiments. Toy wheels may not be identical, and tiny slopes can change the outcome. Encourage students to record unexpected results instead of hiding them. Let them revise their predictions, explain errors, and test again. Physics becomes more meaningful when evidence challenges an attractive guess.

Preparing Toy Cars and Simple Experiment Materials

7 Tips How to Teach Physics Concepts Using Toy Cars?

Preparing Toy Cars and Simple Experiment Materials

A useful setup starts with ordinary materials, not expensive equipment. Prepare two or three toy cars with different weights, wheels, or shapes. Add a wooden board, cardboard ramp, books, masking tape, ruler, stopwatch, and graph paper. Check every wheel before class. A loose axle can distort the results.

Use books to change the ramp height gradually. Mark a clear starting line with tape. Keep the track straight and free from dust. Students can measure distance and time, then calculate average speed. A tray beneath the ramp helps contain runaway cars. It also prevents interruptions.

The OECD PISA 2022 technical report covered about 690,000 students across 81 countries and economies. Its science framework emphasizes applying knowledge to real-world problems, making simple investigations valuable. The National Academies’ science framework also stresses evidence, modeling, and explanation. Record three trials for each setup. Compare the results, not just the fastest run. Perfect data is unlikely. That is useful.

Avoid mixing too many variables. Change only the ramp height or car mass during one test. Use a phone camera only when timing becomes difficult. Protect fingers and keep the track low. I sometimes prepare too many materials, which distracts learners. A smaller kit often creates better questions. Leave space for students to predict, disagree, and revise their explanations.

Preparing Toy Cars and Simple Experiment Materials

Average rolling distance of a toy car released from the same ramp height on different surfaces

This classroom experiment helps students explore friction and motion. Release the same toy car from a fixed ramp height, measure how far it travels, and repeat each trial three times. A smoother surface generally allows the car to roll farther because less mechanical energy is lost to friction.

Exploring Motion, Speed, and Acceleration

7 Tips: How to Teach Physics Concepts Using Toy Cars?
Exploring Motion, Speed, and Acceleration

Toy cars make motion visible and measurable. I use a smooth floor, a ruler, masking tape, a timer, and a notebook. Mark a straight track with distances such as 50 centimeters and 100 centimeters. Keep the starting point fixed. Small changes can affect the results. Let students release the car without pushing it. This helps them observe motion more fairly.

Ask learners to record the time needed to cross each distance. Speed equals distance divided by time, so they can calculate simple averages. Repeat every test at least three times. Reliable evidence needs repeated measurements. Compare a flat track with a slightly raised one. A slope usually changes the car’s speed. Use tape marks every 20 centimeters to study acceleration. If the car covers later sections faster, its velocity is changing.

My early trials were messy. The car sometimes drifted sideways, and hand timing was inconsistent. That mistake became useful evidence. Students can discuss friction, reaction time, and uneven surfaces. Try heavier and lighter cars, but control the track and release point. Ask students to predict the result before testing. Their predictions may be wrong, which creates a valuable science conversation. A teacher should encourage careful records, honest uncertainty, and explanations supported by measurements. Stop the car safely before adjusting the track.

7 Tips How to Teach Physics Concepts Using Toy Cars? - Exploring Motion, Speed, and Acceleration

Tip Physics Concept Classroom Activity Example Measurements Calculation Learning Focus
1 Describe Motion with Distance and Time Mark a 2.0 m track and let students record how long the car takes to travel from start to finish. Distance: 2.0 m
Time: 4.0 s
Motion occurs because position changes over time. Students distinguish position, distance, and elapsed time.
2 Calculate Average Speed Repeat the track test three times and use the average time rather than relying on one measurement. Distance: 2.0 m
Average time: 4.0 s
Speed = distance ÷ time
2.0 ÷ 4.0 = 0.50 m/s
Students learn that average speed describes how much distance is covered per unit of time.
3 Compare Friction on Different Surfaces Run the same car over a smooth board, felt, and coarse paper while keeping the distance at 2.0 m. Smooth board: 3.2 s
Felt: 5.0 s
Coarse paper: 7.5 s
Smooth: 0.63 m/s
Felt: 0.40 m/s
Coarse paper: 0.27 m/s
Students connect surface texture and friction with changes in motion.
4 Explore Acceleration on a Ramp Release the car from rest on a ramp and measure the distance and travel time without pushing it. Distance: 0.80 m
Time: 1.26 s
Initial speed: 0 m/s
a = 2d ÷ t²
1.60 ÷ 1.5876 ≈ 1.01 m/s²
Students observe that acceleration is a change in velocity over time.
5 Investigate Mass and Force Apply approximately the same pulling force to cars with different masses and compare their acceleration. 0.20 kg car: 0.90 m/s²
0.40 kg car: 0.46 m/s²
F = ma
0.20 × 0.90 = 0.18 N
0.40 × 0.46 = 0.18 N
Students see that, for a similar net force, greater mass produces less acceleration.
6 Demonstrate Momentum in a Collision Roll one car into an identical stationary car and record the speeds immediately before and after contact. Each mass: 0.20 kg
Before: 0.80 m/s and 0 m/s
After: 0.39 m/s and 0.41 m/s
Before: 0.20 × 0.80 = 0.16 kg·m/s
After: (0.20 × 0.39) + (0.20 × 0.41) = 0.16 kg·m/s
Students use momentum to describe motion transferred during a collision.
7 Graph Results and Discuss Uncertainty Repeat the same 2.0 m trial five times, calculate the mean, and plot distance against time or speed against trial number. Times: 3.8, 3.9, 4.0, 4.1, 4.2 s
Mean: 4.0 s
Range: 0.4 s
Mean speed = 2.0 ÷ 4.0 = 0.50 m/s
Approximate half-range uncertainty: ±0.20 s
Students recognize variation in measurements and use repeated trials to improve reliability.

Suggested units: distance in metres (m), time in seconds (s), speed in metres per second (m/s), acceleration in metres per second squared (m/s²), mass in kilograms (kg), force in newtons (N), and momentum in kilogram-metres per second (kg·m/s).

Demonstrating Forces, Friction, and Collisions

7 Tips: How to Teach Physics Concepts Using Toy Cars?

Toy cars turn invisible forces into visible motion.

Tip 1: Use a smooth ramp and a rough mat. Compare how far the same car travels.

Tip 2: Change one variable at a time, such as ramp height.

Tip 3: Ask students to predict the distance before testing. Their guesses reveal misconceptions.

Tip 4: Measure distance with a ruler, not only with eyesight. Repeat each trial three times.

PISA 2022 reported an OECD average science score of 485, showing that science understanding remains a serious classroom challenge. Hands-on measurement can support inquiry, but it cannot replace clear explanations.

Tip 5: Demonstrate friction with different surfaces, including cardboard, fabric, and plastic. A heavier load may increase normal force and alter friction. Keep the car design unchanged.

Tip 6: For collisions, use two cars with different masses. Record speed, direction, and stopping distance before contact. Use slow-motion video when possible.

The National Academies’ A Framework for K-12 Science Education emphasizes modeling, evidence, and explanation. Students should draw force arrows before discussing results.

Tip 7: Let groups challenge each other’s conclusions. Ask, “What evidence supports that claim?” My early trials were imperfect. The ramp was slightly uneven. That mistake became useful. Students noticed uncontrolled variables and redesigned the test. Avoid calling every collision “equal.” Momentum depends on mass and velocity. A gentle collision can still produce a surprising change in direction.

Keep fingers clear. Never launch cars toward faces or walkways.

Assessing Learning Through Hands-On Toy Car Activities

7 Tips How to Teach Physics Concepts Using Toy Cars?

Assessing Learning Through Hands-On Toy Car Activities

Toy cars can turn force, motion, friction, and energy into visible evidence. Begin with one clear target, such as explaining why a car slows down. Ask students to predict its stopping distance before testing. Keep the ramp height fixed. Change only the surface. Measure distance with a ruler and time with a stopwatch. Record three trials, not one lucky result. Students should explain patterns using words, numbers, and simple diagrams.

Use short questions during the activity. “What changed?” “What stayed constant?” “What evidence supports your claim?” Ask students to compare a smooth track with cardboard, fabric, or sandpaper. Let them calculate average speed from distance and time. Then require a claim-evidence-reasoning response.

This checks understanding better than watching the car move. It also reflects the OECD PISA 2022 science framework, which emphasizes explaining phenomena, evaluating evidence, and interpreting data.

My first trial was messy. A stopwatch slipped, and one group pushed the car harder. I had to repeat the test. That mistake became useful evidence about fair testing.

Freeman and colleagues analyzed 225 studies in PNAS and found active learning improved assessment performance by 6%. However, movement alone does not prove learning.

Ask each student to sketch forces and defend one conclusion aloud. Watch for copied answers. PISA 2022 reported an OECD science average of 485 points, reminding teachers that reasoning needs deliberate assessment.

FAQS

: What materials are needed for a toy car physics experiment?

: Prepare two or three toy cars, a wooden board, books, tape, a ruler, and graph paper. A stopwatch can help.

How can students measure a toy car’s speed?

Mark distances such as 50 and 100 centimeters. Record the travel time three times. Speed equals distance divided by time.

How should the ramp be prepared?

Use books to raise one end gradually. Mark a fixed starting line with tape. Keep the track straight.

Why should only one variable change during testing?

Change only ramp height or car mass in one trial. Keep the surface and release point unchanged. Too many changes confuse results.

How can students investigate acceleration?

Add tape marks every 20 centimeters. Compare the time across early and later sections. Later sections may be faster.

How can friction be demonstrated?

Test the same car on cardboard, fabric, plastic, and a smooth floor. Measure its stopping distance each time. The results may surprise students.

How can toy car collisions support learning?

Use cars with different masses. Record speed, direction, and stopping distance before contact. Students can draw force arrows.

What common problems can affect the results?

Loose wheels, uneven ramps, sideways drifting, and hand timing can distort measurements. My early trials were messy. Students should discuss these limits and redesign the test.

What safety steps should teachers follow?

Keep the track low and fingers clear. Use a tray to catch runaway cars. Never launch cars toward faces or walkways.

Conclusion

This guide presents practical ideas for how to teach physics concepts using toy cars in an engaging, hands-on way. It begins by showing how toy cars can help learners connect abstract physics principles with familiar, observable movements. Teachers can prepare simple materials such as ramps, measuring tools, books, and safe surfaces, allowing students to investigate motion through playful experiments.

The activities gradually explore distance, time, speed, and acceleration, while encouraging students to make predictions and compare results. Toy cars can also demonstrate forces, friction, gravity, and collisions by changing the ramp angle, surface texture, or car position. Through observation and discussion, learners can explain why cars move differently and how forces affect their motion. Finally, teachers can assess understanding through experiment records, group explanations, diagrams, and short challenges, making learning both active and meaningful.

Liam

Liam

Liam is a dedicated marketing professional with a profound expertise in the industry, where he excels at highlighting the unique advantages of our core products. With a keen understanding of market trends and consumer needs, Liam frequently updates our company’s professional blog, providing......